Contents
Scanning Settings
My memory is a bit fuzzy on some of this, but here goes. All of the image enhancements and filters should be turned OFF. The gain setting should be neutral as well. You should scan (I'm 90% sure on this) in Postitive mode, not negative mode. We checked the scanner output using an expensive OD step strip, and over the typical 1-2 OD range found in cryoEM images the output was linear enough that I believe we decided we didn't need to do any further linearization to get OD's in this mode. Under the 'Scanner Extras' tab, there were 3 things to set: 'Super Fine Scan' mode, which scans 1 line at a time instead of 3 (otherwise you may get a Fourier artifact). 16 bit mode (while it isn't clear how many of the 16 bits you get above noise, it avoids histogram compression issues (ie - you don't have to deal manually with Analog Gain or A/C adjustments). Focus (see the section below). Once the holder has been 'flattened', autofocus should be ok for typical images.
The EMAN2 program 'e2scannereval.py' can be quite useful in debugging problems (look here e2scannereval.py)
Description Of Our Modifications
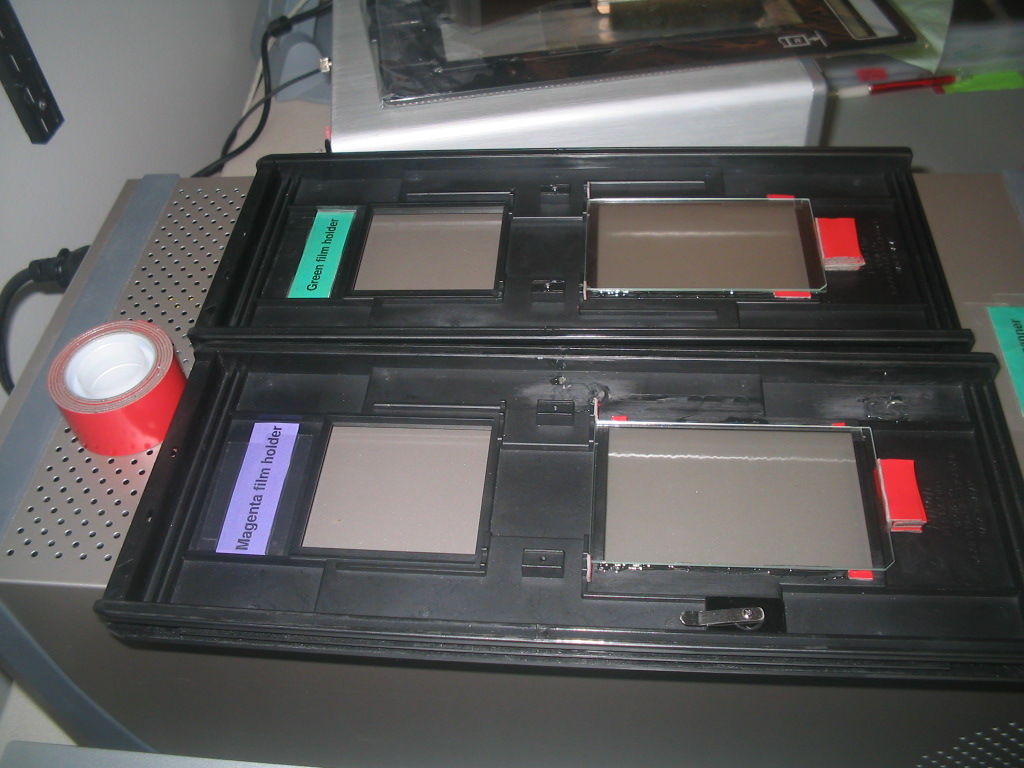
Here at the NCMI we're running two Nikon 9000 scanners on two Windows machines. The holder type we modified was an FH869M, glassless holder, for both scanners. It is a trivial operation. The FH869M holder is a mounted film holder. That is, it's designed for film surrounded by a plastic support rather like 35mm slides. Given that the glass plate is relatively thin, and the scanner has a fairly broad focus range, all you really have to do is shave off the surface of the holder so the glass plate can support the film at a height close to the height the mounted film would have been at. Since the operation is simply milling down a few protrusions from the surface, there are no technical drawings. Since you will end up supporting the film on the corners with thin pieces of 2-sided tape anyway, it doesn't really matter if the milling operation is absolutely perfect.
In particular, the bottom piece of glass is glued to the film holder, on which the film is placed, and this is sandwiched by another sheet of glass which is placed on top by the Nikon scanner operator. The top piece of glass and film are held roughly in place by make-shift guides. Important points are
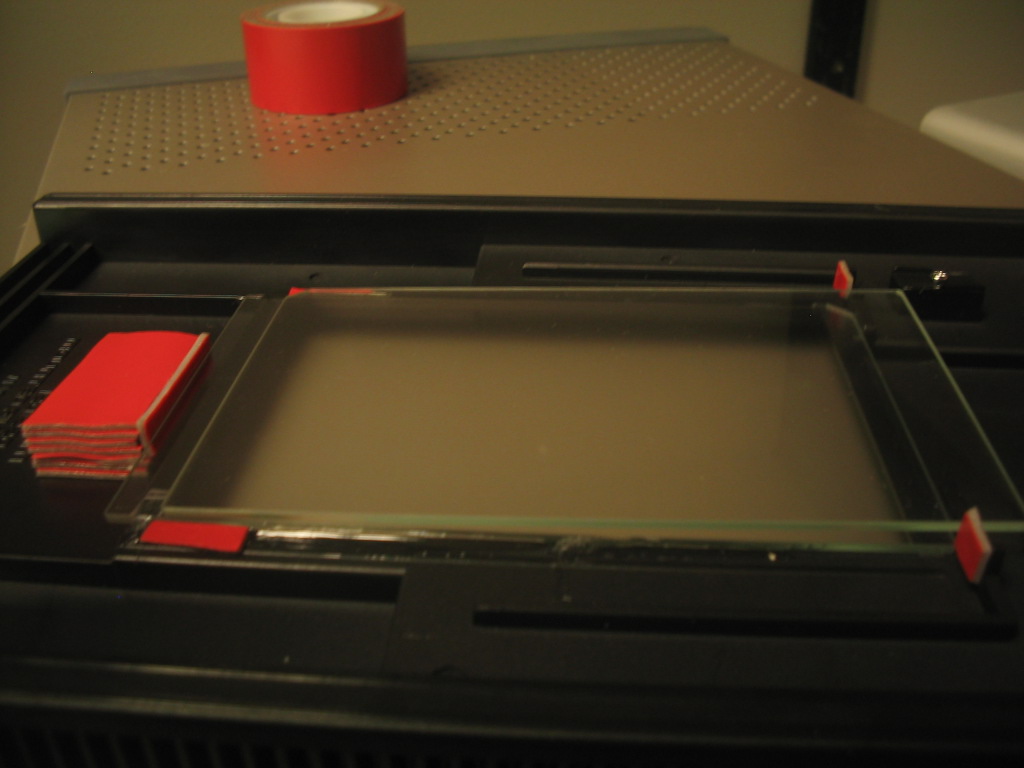
The bottom sheet of glass is leveled relative to the scanning system - we did this by elevating the corners of the glass plate using tiny cubes of sticky tape piled in stacks. Then, in the Nikon scanner GUI, we took focus readings on the corners and in the middle of several test films, until it was clear that the focal depth was relatively consistent across the entire film. Also, e2scannereval.py proved a very useful tool for the qualitative detection of tilt. For both film holders there was, roughly speaking, a consistent tilt - though varying in extremity. The tilt was only slight, and its effects are not all that great. This slight tilt could have been due to imperfections in the milling process, film holder, or the scanner itself.
- The anti-Newton glass is only coated on one side, this is the side that faces the film in our design.
The glass didn't come with the holder we had to order it in. Because the bottom piece of glass is glued it stays there, but the sandwiching piece just slides around unless you think of someway to hold it still - so we just put some bits of thick tape here and there so everything stays approximately still.
Below are some pictures of our film holders.


How To Take Manual Focus Readings Using Nikon Scan 4.0
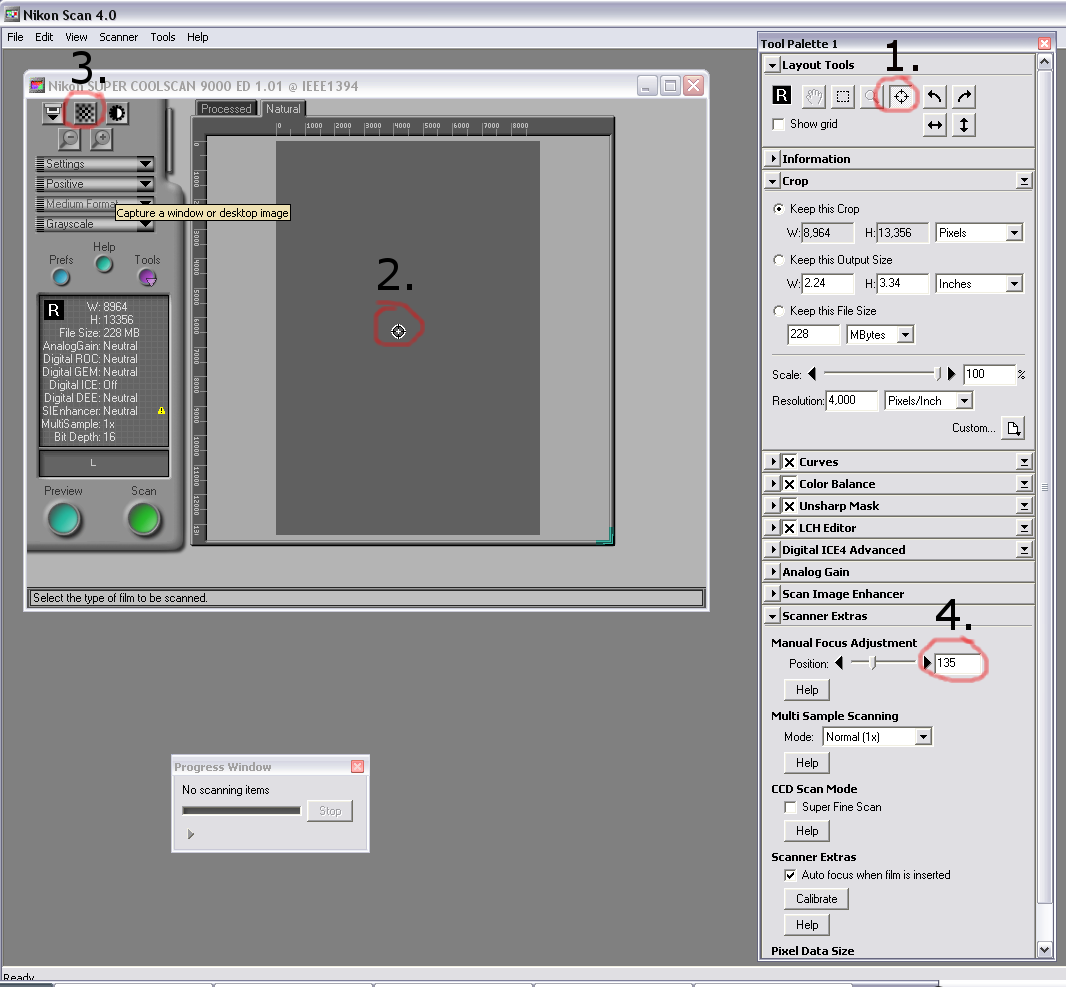
Below is an image that shows how to take a manual focus reading using Nikon Scan 4.0. Briefly these steps are:
Press the Focus tool button in Tool Palette 1
- Click on the location in the scan area where you want to determine the focus reading
Click on the Auto Focus button in the main interface controller ... wait while the focus reading is taken
- Observe the results of the focus reading in Tool Palette 1

